Opening the book…
Important Note: The remaining exercises have many steps, so make sure to save your work often as you step through. You don’t want to risk having to start over if Photoshop® crashes while you’re working!
- To start this exercise, make sure you have loaded the left mustache selection from your Alpha Channel.
- Duplicate the selected pixels into a new layer by pressing Cmd+J on your keyboard (or you could copy and paste using the Edit menu or Cmd+C and Cmd+V key commands).
- Rename the Background layer to “original image” and the copied Layer 1 to “left mustache”.

- Make sure that “left mustache” is your active layer. Use the Move Tool to position the mustache on the left side of the cat’s face.
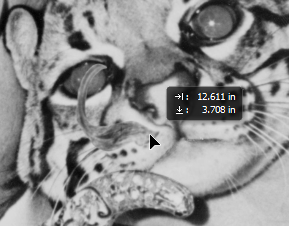 Watch Out: If the left mustache layer was not active (highlighted) you may have moved the layer containing the original image. Make sure the layer that you want to edit is active before editing.
Now we’ll rotate the mustache to match the angle of the cat’s head. Use Edit > Free Transform (or Cmd+T) to activate the transformation bounding box. Before you start rotating, move the Free Transform’s reference point from the center of the bounding box to the right end of the mustache by clicking and dragging the center crosshairs as shown below. This will allow you to rotate from that point instead of from the center of the layer’s pixels. Rotate the mustache and press the Enter key on your keyboard to finalize the transformation.

Finally, add a Levels Adjustment Layer and clip it to the left mustache layer. Adjust the levels to make the mustache darker. We will add a final adjustment for contrast at the end of this exercise, but making this adjustment now will make our next steps easier to see.
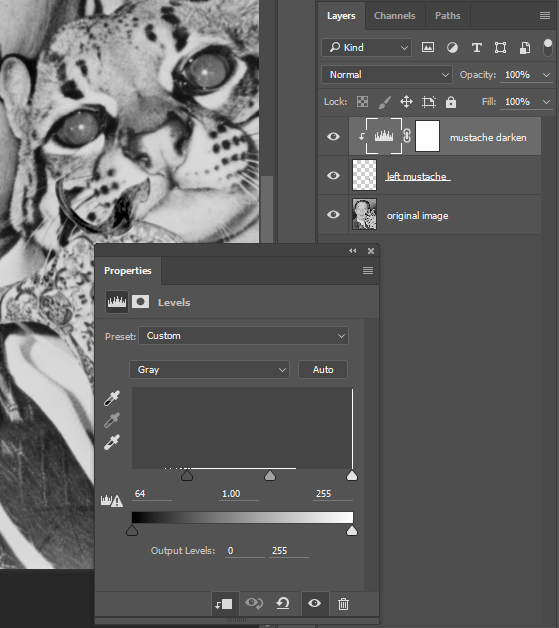
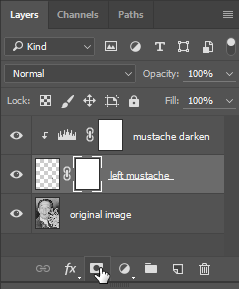
Now we will blend the edges of the mustache using the Brush Tool on the layer mask. This will make the mustache appear more realistic on the cat’s face. Click on the Brush Tool in the Tool Panel (or press the B key on your keyboard), then get set up with the following steps:
- Make sure black is set as your foreground color. Black will be used on the mask to hide parts of the layer content.
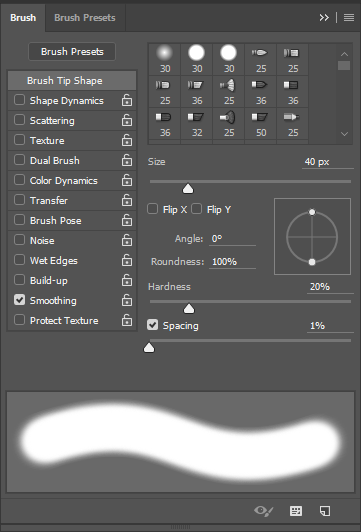
- Use Window > Brush to show the Brush Panel. Adjust your Brush settings to a big, soft brush. We set our brush size to 40 pixels with a 20% hardness. We also find that setting the Spacing to 1% results in a much smoother painting experience.
Now, paint just around the edges of the mustache with the edge of the Brush Tool brushing against the edge of the mustache. You may need to increase or decrease your brush size while painting – remember that you can use the ] key to increase brush size and the [ key to decrease.
Tip: In Photoshop® Preferences (press Cmd+K), go to the Cursors settings and select “Full Size Brush Tip” under “Painting Cursors”. This will show a more accurate brush cursor when using a soft brush and will make it easier to tell where your brush edge is, including the soft fade.


 Tip: If you see a warning that says “Could not make a new layer from the selection because the selected area is empty.” then you probably did not make the correct layer active before pasting or floating.

11.02: Exercise 2: Saving a selection on a layer mask is shared under a CC BY-NC-SA 4.0 license and was authored, remixed, and/or curated by LibreTexts.
The book could not be loaded just now.