Opening the book…
Propagation of bulbs includes a variety of techniques: scaling, scooping and scoring. All of these techniques share the following work habits. 1) These techniques are used when bulbs are dormant. 2) The first step is to clean and dry the bulb. 3) Bulbs are then inspected to make sure they are healthy. 4) to maintain the health of the bulbs all equipment and work surfaces should be sterilized. 4) Following the procedure, fungicides should be applied to all cut tissues. It should be noted that plants using bulbs and corms for overwintering are perennials and it can take several years before new bulbs reach maturity and flower.
Scaling: Scaling is used on bulbs that are loosely bunched together, thus the scales can be removed by hand. Bulbs such as lilies and some fritillaries can be propagated by scaling. Once the shoot growth (above ground growth) has naturally died down for the winter, the bulb should be lifted, cleaned and dried. A number of outer scales can then be simply snapped off. They should be removed as close to the basal plate as possible. A small amount of the basal plate is need for successful propagation. Any unhealthy or damaged scales should be discarded. The parent bulb should be re-planted immediately. If the goal is to maximize the number of propagules, the parental bulb can be used in its entirety.
All removed scales and the parent bulb should be treated with a fungicide to prevent any infections while healing and growing. The removed scales should be place it in a plastic bag with a moist mixture of half perlite and half peat/coir or vermiculite. The plant tissues will need oxygen as they grow, so this can be supplied by inflating the bag by blowing air into it. Seal the bag (label it!) and then store it in a dark location at around 68oF.

After a few months, tiny bulbs (‘bulblets’) will have formed at the base of the scales. Individual bulblets can be potted in a loose mixed medium consisting of half loam-based potting soil and half sand. Prior to planting removed the scale but not if it is attached to the newly formed roots of the bulblet. Place the potted bulblets in a cool, shady place over the summer and move to a warm location such as a cold frame for the winter. Each spring they should be repotted, until they reach flowering size, at which point they can be planted out in a garden. This processed takes about three to five years for the bulblets to reach maturity.
Scooping: For more traditional bulbs like that of onions or hyacinths, scooping can be used to force the creation of bulblets. This requires the use of a sterilized scalpel or a teaspoon with a sharpened edge. The center of the basal plate is scooped out leaving only the outer rim intact. Since any open wound is susceptible to fungal attach, the cut surface should be treated with a fungicide. Scooped bulbs should be placed in a moist sand tray with the scooped area facing upwards and stored in a warm, dark place. The sand should be kept moist but not saturated. After 12 weeks new bulblets should have formed on the scooped area. Detach them when they are large enough to handle and pot them as if they were seeds. This technique can produce 30 plus bulblets. It will take about 5 yrs for them to reach a good size (mature) and flower.

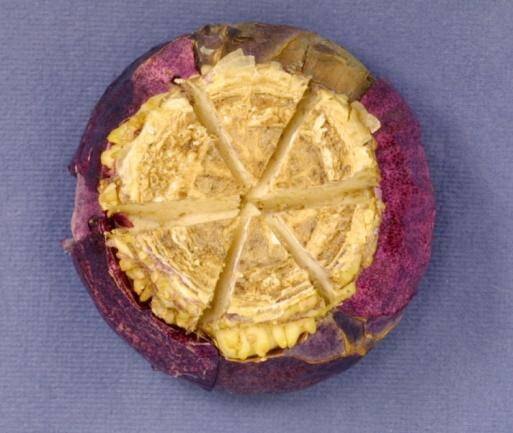
Scoring: This technique follows the same process as scooping but instead of removing all the inside of the basal plate, cuts are made across it or thin wedges of basal plate and bulb tissues are removed in a cross formation (Figure 9-31). Bulbs should be dusted with a fungicide and the allowed to dry in sand for about a week. They can then be placed in a dark, warm space with high humidity. The new bulblets form at the base of the exposed leaf scales. This procedure produces about 12-25 bulblets in about 12-14 weeks. It usually takes scored bulblets 3 years to reach maturity and flower.
Sectioning: Corm and some bulbs can be used to propagate plants using the sectioning technique. In this method the entire structure, bulb or corm, is cut into wedges as evenly as possible. For bulbs, it is important that part of the basal disk be included with each sectional cut. For corms, each segment must contain part of the corm’s stem. Since this technique creates significant cut surface area, fungicides can best be applied using the “shake and coat” method. Place section in a bag with the fungicide and then shake until all segments are coated with the fungicide. Once treated, the sections are placed and seal in a bag with damp potting soil/sand mixture and store in a dark, warm location for approximately 12 weeks. The new cormels (miniature corms) or bulblets can be removed and planted. It will take several years for them to reach maturity and flower.

Sectioning can be used with tuber and rhizome to produce propagules. Both tubers and rhizomes are modified stems and, as such, they have nodes that contain meristematic tissue. When cut into sections such that each piece has one or more nodes, the pieces can potentially develop into new plants. What are called “seed” potatoes are tubers cuts into segments such that each section contains one or more eyes. Potato tuber eyes are nodes. When purchased pre-cut they are often coated with a fungicide to prevent pathogens that might cause damage or death.

This page titled 9.2.5: Propagating Bulbs, Corms, Tubers and Rhizomes was last modified on Sat, 14 Nov 2026 17:19:30 GMT and is shared under a CC BY-NC-SA 4.0 license and was authored, remixed, and/or curated by Stephanie Harvey.
The book could not be loaded just now.